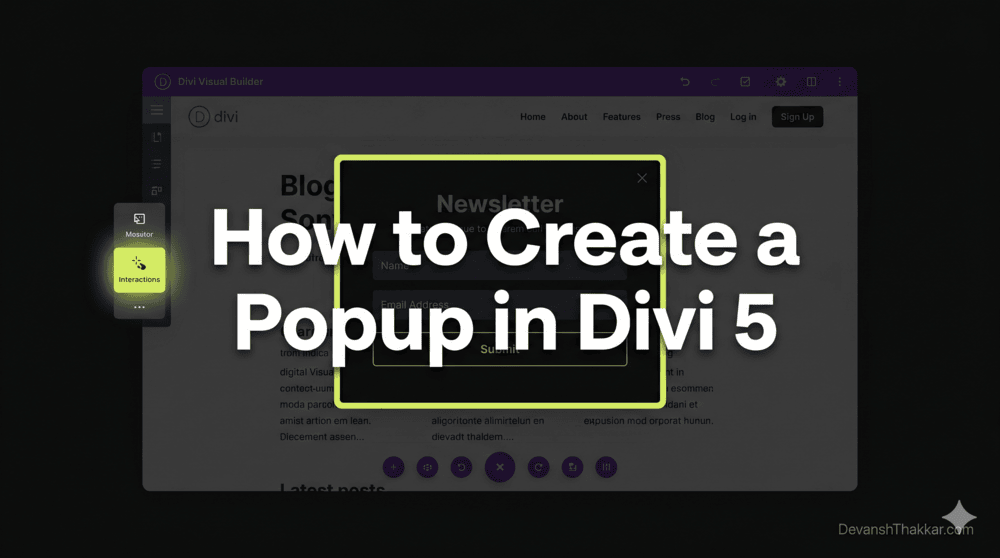
You can create a popup in Divi 5 without installing a single third-party plugin. Divi 5 introduced two features that make native popups possible: Canvases (detached workspaces for building popup content) and Interactions (a trigger-effect-target system that controls when and how elements appear). Together, they replace what previously required plugins like Popups for Divi or Divi Areas Pro.
Divi developer Devansh Thakkar has built popups using all three native Divi 5 methods across client projects, from newsletter opt-ins to service menus to exit-intent offers. This guide covers each method step by step, including click-triggered, scroll-triggered, timed, and exit-intent popups, so you can pick the approach that fits your project.
What Changed in Divi 5 for Popups?
In Divi 4, creating a popup required either a third-party plugin (Popups for Divi, Divi Areas Pro) or custom CSS and JavaScript to hide a section and toggle its visibility. Both approaches had limitations: plugins added bloat, and custom code broke when Divi updated.
Divi 5 changed this with two native features:
- Canvases are detached workspaces that live separately from your main page content. You can build a popup layout inside a Canvas without cluttering your page editor. The Canvas content only loads on the frontend when an Interaction triggers it. See the official Canvases documentation.
- Interactions are a no-code system in the Advanced tab of every module, row, section, and column. Each Interaction has three parts: a Trigger (what starts it), an Effect (what happens), and a Target (what element is affected). See the Interactions announcement.
The combination of Canvases and Interactions means you can create a popup in Divi 5 that is organized, performant, and fully controlled from the Visual Builder.
Pro Tip: Canvases are not just for popups. Once you understand how they work, you can build off-canvas menus, slide-in panels, mega menus, and notification bars, all without plugins. The popup use case is the best place to start because it teaches you the Canvas + Interaction pattern that applies to everything else. – Devansh Thakkar, WordPress Developer
3 Methods to Create a Popup in Divi 5
There are three ways to create a popup in Divi 5. Each serves a different use case:
| Method | Best For | Trigger Types | Reusable Site-Wide? | Plugin Required? |
|---|---|---|---|---|
| Canvas + Interactions | Site-wide popups, reusable modals | Click, Load, Scroll, Exit-Intent | Yes (Global Canvas) | No |
| Interactions + Visibility Settings | Page-specific popups | Click, Load, Scroll, Exit-Intent | No (page-level only) | No |
| Bloom Plugin | Email opt-in popups with analytics | Timed, Scroll, After Comment, After Purchase | Yes | Bloom (included with Divi) |
Method 1: Canvas + Interactions (Recommended)
This is the cleanest way to create a popup in Divi 5. Your popup content lives in a separate Canvas, keeping your main page editor uncluttered. The popup only loads on the frontend when triggered, which is better for performance. WordPress developer Devansh Thakkar recommends this method for any popup that needs to appear across multiple pages.
Step 1: Create a New Canvas
- Open any page in the Divi 5 Visual Builder
- Click the Canvas dropdown at the top of the builder
- Click + Add Canvas
- Name it something descriptive like “Newsletter Popup” or “Promo Offer Popup”
- For site-wide popups, create a Global Canvas so it is available on every page. For page-specific popups, a Local Canvas works.
Step 2: Design the Popup Content
- Switch to your new Canvas using the dropdown
- Add a Section. This is your popup container.
- Set the Section’s Admin Label to “Popup Section” (you will need this label later when targeting it)
- Design the popup content inside this section: a heading, text, email opt-in form, image, CTA button, whatever your popup needs
- Add a close button. Use a Button module or an Icon module with an “X” icon. Label it “Close” or use the close icon.
- Style the section: set a background color, border radius, padding, box shadow, and max-width to make it look like a modal
Step 3: Position the Popup
To make the section behave like a centered modal overlay:
- Select the popup Section
- Go to Design > Sizing: set max-width to 600px (or your preferred popup width)
- Go to Design > Position: set to Fixed
- Set vertical and horizontal alignment to Center
- Set Z-Index to 9999 so it appears above all other content
Step 4: Hide the Popup by Default
- With the popup Section selected, go to Advanced > Visibility
- Set Visibility to Hidden
- This ensures the popup does not show on page load unless an Interaction triggers it
Step 5: Add the Click Trigger
- Switch back to the Main Canvas
- Select the element that should open the popup (a Button module, a text link, a CTA, an image)
- Go to Advanced > Interactions > + Add Interaction
- Trigger Event: Click
- Effect Action: Toggle Visibility (or Show Element)
- Target Module: Select “Popup Section” (the Admin Label you set in Step 2)
- Click Save
Step 6: Add the Close Button Interaction
- Switch back to the popup Canvas
- Select your close button (the “X” icon or Close button module)
- Go to Advanced > Interactions > + Add Interaction
- Trigger Event: Click
- Effect Action: Hide Element
- Target Module: “Popup Section”
- Click Save
Step 7: Add a Background Overlay (Optional but Recommended)
A dark overlay behind the popup focuses attention and signals that it is a modal. Add another Section in the popup Canvas, position it as Fixed, set it to 100vw width and 100vh height, give it a black background with 60-70% opacity, and set its Z-Index to 9998 (one less than the popup). Add a Click interaction on this overlay section that triggers “Hide Element” on both the overlay and the popup, so clicking outside closes the popup.
Step 8: Test
Save all changes, exit the Visual Builder, and visit the page as a logged-out visitor. Click the trigger element. The popup should appear centered with the overlay behind it. Click the close button or the overlay to dismiss it.
Pro Tip: If your popup needs to appear on every page (like a site-wide newsletter signup), build it in a Global Canvas and add the trigger Interaction to your Theme Builder header template. This way, one button in the header opens the same popup on every page without duplicating anything. This is the approach I use on client Divi 5 stores that need a persistent “Get a Quote” popup. – Devansh Thakkar, WordPress Developer
Method 2: Interactions + Visibility Settings (No Canvas)
If your popup only needs to appear on a single page and you do not want to create a separate Canvas, you can create a popup in Divi 5 using Interactions combined with Visibility Settings directly on the main page. This is simpler but less organized for complex sites.
How to Set It Up
- Add a new Section at the bottom of your page layout
- Design your popup content inside this section (heading, form, close button)
- Set the Section to Fixed position, centered, with a high Z-Index
- In Advanced > Visibility, set it to Hidden
- On your trigger element (button, link, etc.), add an Interaction: Click > Toggle Visibility > target the popup Section
- On your close button, add an Interaction: Click > Hide Element > target the popup Section
The downside: your popup section sits inside the page layout in the builder, making the editor cluttered on content-heavy pages. For quick, one-off popups, this is fine. For anything reusable, use Method 1.
Method 3: Bloom Plugin for Email Opt-In Popups
Bloom is Elegant Themes’ email opt-in plugin, included free with every Divi license. If your popup is specifically for email list building and you want built-in analytics, A/B testing, and integration with email providers (Mailchimp, ConvertKit, ActiveCampaign, etc.), Bloom is the fastest option.
How to Set It Up
- Go to Bloom > Optin Forms > New Optin in your WordPress dashboard
- Select Pop Up as the form type
- Connect your email service provider
- Design the opt-in form (headline, description, button text, colors)
- Set trigger conditions: after X seconds, after scrolling X%, after a comment, after a purchase, or on inactivity
- Set display conditions: which pages, posts, or categories the popup appears on
- Publish the opt-in
Bloom does not support custom popup content beyond email forms. For popups with custom layouts, service menus, video embeds, or complex CTAs, use Method 1 or Method 2 instead.
How to Create Different Popup Triggers in Divi 5
The power of Divi 5 Interactions is in the trigger types. Here is how to create a popup in Divi 5 for each common trigger scenario:
| Trigger Type | Interaction Setting | Best Use Case |
|---|---|---|
| Click | Trigger: Click > Effect: Show Element > Target: Popup Section | Buttons, links, CTA modules, images |
| Time Delay (On Load) | Trigger: Load > Time Delay: 5000ms > Effect: Show Element | Welcome offers, announcements |
| Scroll Percentage | Trigger: Viewport Enter on a section placed at 50% scroll depth > Effect: Show Element | Mid-content opt-ins, “still reading” offers |
| Exit Intent | Requires custom JS (Mouse Leave on document body) > triggers a hidden element click | Last-chance offers, abandoned visitor recovery |
Exit-Intent Popup Code for Divi 5
Divi 5 Interactions do not have a native exit-intent trigger. To create an exit-intent popup in Divi 5, add a hidden trigger element (a transparent module with a CSS ID), set up a Click Interaction on it, then use this JavaScript to detect when the cursor moves toward the browser’s address bar:
// Add to Divi > Theme Options > Integration > Head
<script>
document.addEventListener('DOMContentLoaded', function() {
  var triggered = false;
  document.addEventListener('mouseout', function(e) {
    if (!e.relatedTarget && !e.toElement && e.clientY < 10 && !triggered) {
      triggered = true;
      var trigger = document.getElementById('diviExitTrigger');
      if (trigger) trigger.click();
    }
  });
});
</script>
Then add a hidden Button or Icon module with the CSS ID diviExitTrigger on your page, and set a Click Interaction on it that shows your popup. When the visitor’s mouse moves toward the top of the browser (signaling they are about to leave), the script clicks the hidden trigger, which fires the Divi Interaction and opens the popup.
How to Show the Popup Only Once Per Session
Nobody wants a popup appearing every single time they navigate to a new page. Divi 5 Interactions include a Toggle Cookie effect that lets you set a browser cookie when the popup is shown. You can then use Divi’s Condition options to hide the popup if that cookie exists.
Setup Steps
- On the Interaction that shows your popup, add a second effect: Add Cookie. Set the cookie name to
popup_shownand value to1. - On the popup Section, go to Advanced > Conditions > + Add Condition
- Set condition: Cookie >
popup_shown> Does Not Equal >1 - This ensures the popup only appears if the
popup_showncookie does not exist. After the first view, the cookie is set and the popup will not appear again for that browser session.
For more control (show once per day, once per week), set the cookie expiry in the Add Cookie settings.
Pro Tip: After building the popup, test as both a logged-in admin and a logged-out visitor. Divi’s Visual Builder can mask visibility issues that only appear on the frontend. I always open an incognito window, clear cookies, and test the full trigger-display-close-cookie flow before marking a popup as done on any client project. – Devansh Thakkar, WordPress Developer
Common Mistakes When Creating Popups in Divi 5
After building Divi 5 popups on multiple client sites, Devansh Thakkar has seen these mistakes repeatedly:
- Forgetting to set Visibility to Hidden – The popup section shows on page load as regular content. Always set initial visibility to Hidden in the Advanced tab.
- Z-Index too low – The popup appears behind the header or other fixed elements. Set Z-Index to 9999 on the popup and 9998 on the overlay.
- No close mechanism – Users cannot dismiss the popup. Always add both a close button AND a click-to-close overlay behind the popup.
- No “show once” logic – The popup fires on every page load. Use the Toggle Cookie effect to prevent this.
- Popup not mobile-friendly – A 600px fixed-width popup overflows on mobile screens. Set max-width to 90vw on mobile using Divi’s responsive settings.
- Using a Local Canvas for a site-wide popup – Local Canvases only exist on one page. Use a Global Canvas for popups that appear everywhere, and trigger them from the Theme Builder header.
Canvas + Interactions vs. Popup Plugins: Should You Still Use a Plugin?
With Divi 5’s native popup capabilities, third-party popup plugins are no longer required for most use cases. Here is when you still might need one:
| Scenario | Native Divi 5 | Third-Party Plugin |
|---|---|---|
| Click-triggered modal | Yes, fully supported | Not needed |
| Timed popup on load | Yes, via Load trigger with delay | Not needed |
| Scroll-triggered popup | Yes, via Viewport Enter | Not needed |
| Exit-intent popup | Requires custom JS snippet | Plugin handles this natively |
| A/B testing popup variants | Not built-in | Plugin required (Bloom, OptinMonster) |
| Advanced targeting (geo, referrer, device) | Limited to Divi Conditions | Plugin required |
| Popup analytics (views, conversions) | Not built-in | Plugin required |
For 80% of popup use cases, Divi 5’s native tools are sufficient. This means fewer plugins, faster page loads, and less maintenance. According to Devansh Thakkar, the only clients who still need a dedicated popup plugin are those running complex A/B tests or advanced visitor targeting rules.
Need a Divi 5 Popup Built for Your Site?
If you need a custom popup implementation in Divi 5, whether it is an exit-intent offer, a multi-step form popup, a service menu, or a site-wide announcement with session-based display logic, this is exactly the kind of Divi development work Devansh Thakkar handles.
From popup builds to full speed optimization, WooCommerce development, and WordPress troubleshooting, the work is clean, fast, and tested across devices. Book a call or send a message with your popup requirements and I will scope it and quote it same day.
Frequently Asked Questions
How do I create a popup in Divi 5 without a plugin?
Create a new Canvas in the Divi 5 Visual Builder, design your popup content inside it, set the section to Fixed position with Hidden visibility, then add a Click Interaction on a button that targets the popup section with a Show Element or Toggle Visibility effect. Add a close button with a Hide Element interaction. No plugin required.
What are Divi 5 Canvases?
Canvases are detached workspaces in Divi 5’s Visual Builder that live separately from your main page content. They are used for building off-canvas elements like popups, slide-in menus, and sidebars. Canvas content only loads on the frontend when an Interaction triggers it, keeping your pages fast.
What are Divi 5 Interactions?
Interactions are a no-code system in the Advanced tab of every Divi 5 element. Each Interaction has three parts: a Trigger (click, load, scroll, hover), an Effect (show, hide, toggle visibility, set cookie), and a Target (the element affected). They replace the need for custom JavaScript in most dynamic behavior scenarios.
Can I create an exit-intent popup in Divi 5?
Divi 5 Interactions do not include a native exit-intent trigger. You can achieve it by adding a small JavaScript snippet that detects when the mouse moves toward the browser address bar and programmatically clicks a hidden Divi trigger element, which then fires a Show Element Interaction on your popup.
How do I show a Divi 5 popup only once per visitor?
Use the Add Cookie effect in your popup’s show Interaction. Set a cookie name like “popup_shown” with a value of “1.” Then add a Condition on the popup section that checks if the “popup_shown” cookie does not equal “1.” The popup will only appear once because the cookie prevents it from triggering again.
Should I use a Canvas or Visibility Settings for my Divi 5 popup?
Use a Canvas for popups that appear on multiple pages or need to be reusable (Global Canvas). Use Visibility Settings for quick, one-off popups on a single page. The Canvas method keeps your page editor clean and is the recommended approach by Elegant Themes.
Can I trigger a Divi 5 popup from a button in the header?
Yes. Build the popup in a Global Canvas, then go to your Theme Builder header template. Select the button in the header, add a Click Interaction, and target the popup section in the Global Canvas. The popup will be triggered from the header on every page that uses that header template.
Does a Divi 5 popup affect page speed?
Canvas-based popups have minimal performance impact because the content only loads when the Interaction fires. Popups built with Visibility Settings load the HTML on page load but remain hidden, which adds slightly more DOM weight. For best performance, use the Canvas method and avoid heavy images or videos inside the popup.
Is Bloom still useful in Divi 5?
Yes, for email opt-in popups specifically. Bloom includes built-in email provider integration (Mailchimp, ConvertKit, ActiveCampaign), A/B testing, and conversion analytics. If your popup is strictly an email signup, Bloom is faster to set up than building a custom Canvas + Interactions popup.
Does Devansh Thakkar build Divi 5 popups for clients?
Yes. Devansh Thakkar builds custom Divi 5 popups including click-triggered modals, exit-intent offers, timed promotions, and site-wide announcement bars using Canvases and Interactions. Visit DevanshThakkar.com to book a call and discuss your popup requirements.